Integrations
Cisco Umbrella
With Cisco Umbrella logs in Perch, you can store, search, report, or get notifications of threat activity in Umbrella logs; or have the SOC review them for signs of threat.
To start logging your Cisco Umbrella logs to Perch, you will need a few pieces of information from Umbrella. Review the Cisco Umbrella Log Management documentation to set up Cisco Umbrella and enable the integration.
Umbrella logging
Perch will accept all Cisco Umbrella logs but you may choose to either:
- Log All Requests: For full logging, whether for content, security or otherwise
- Log Only Security Events: For security logging only, which gives your users more privacy — a good setting for people with the roaming client installed on personal devices
When you create a policy, activity logs are by default saved to the North America – California, US Cisco-managed S3 bucket for your organization.
You may optionally configure Umbrella to log to your own S3 bucket. Perch is compatible with all Cisco-managed S3 buckets or your corporate S3 bucket.
Set up Umbrella logging
A Cisco-managed S3 bucket is the easiest to configure. Follow these steps to log to the Cisco-managed S3 bucket. Data can be stored for up to 30 days in the S3 bucket, but with the Perch integration, you can store your Cisco Umbrella data for as long as you like.
When you activate logging, you will be presented with information necessary to set up the Perch integration with Cisco Umbrella.
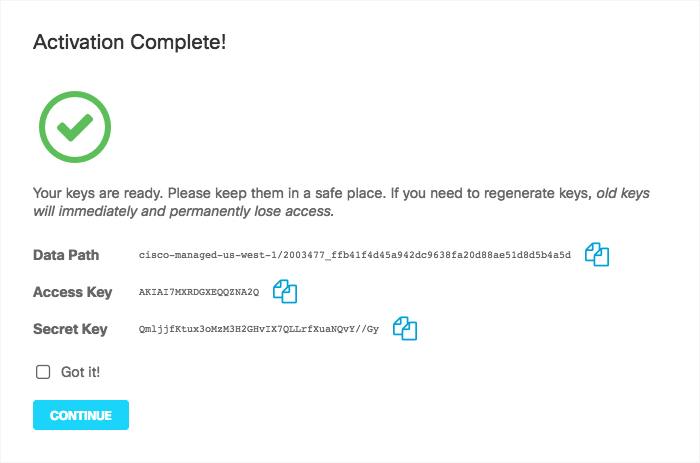
Keep track of your Data Path (including AWS Region), Access Key, and Secret Key in a secure location. You will enter this information into Perch.
If you are an MSP, activate logging on a per-customer basis
Set up the Cisco Umbrella-Perch integration
To connect Perch to your Cisco Umbrella logs, login to Perch. Select the company name from the organization picker for which you will setup the integration. Navigate the Settings on the left hand navigation. Scroll down to the Integrations section of the settings page. You will see a list of integrations that include Cisco Umbrella.
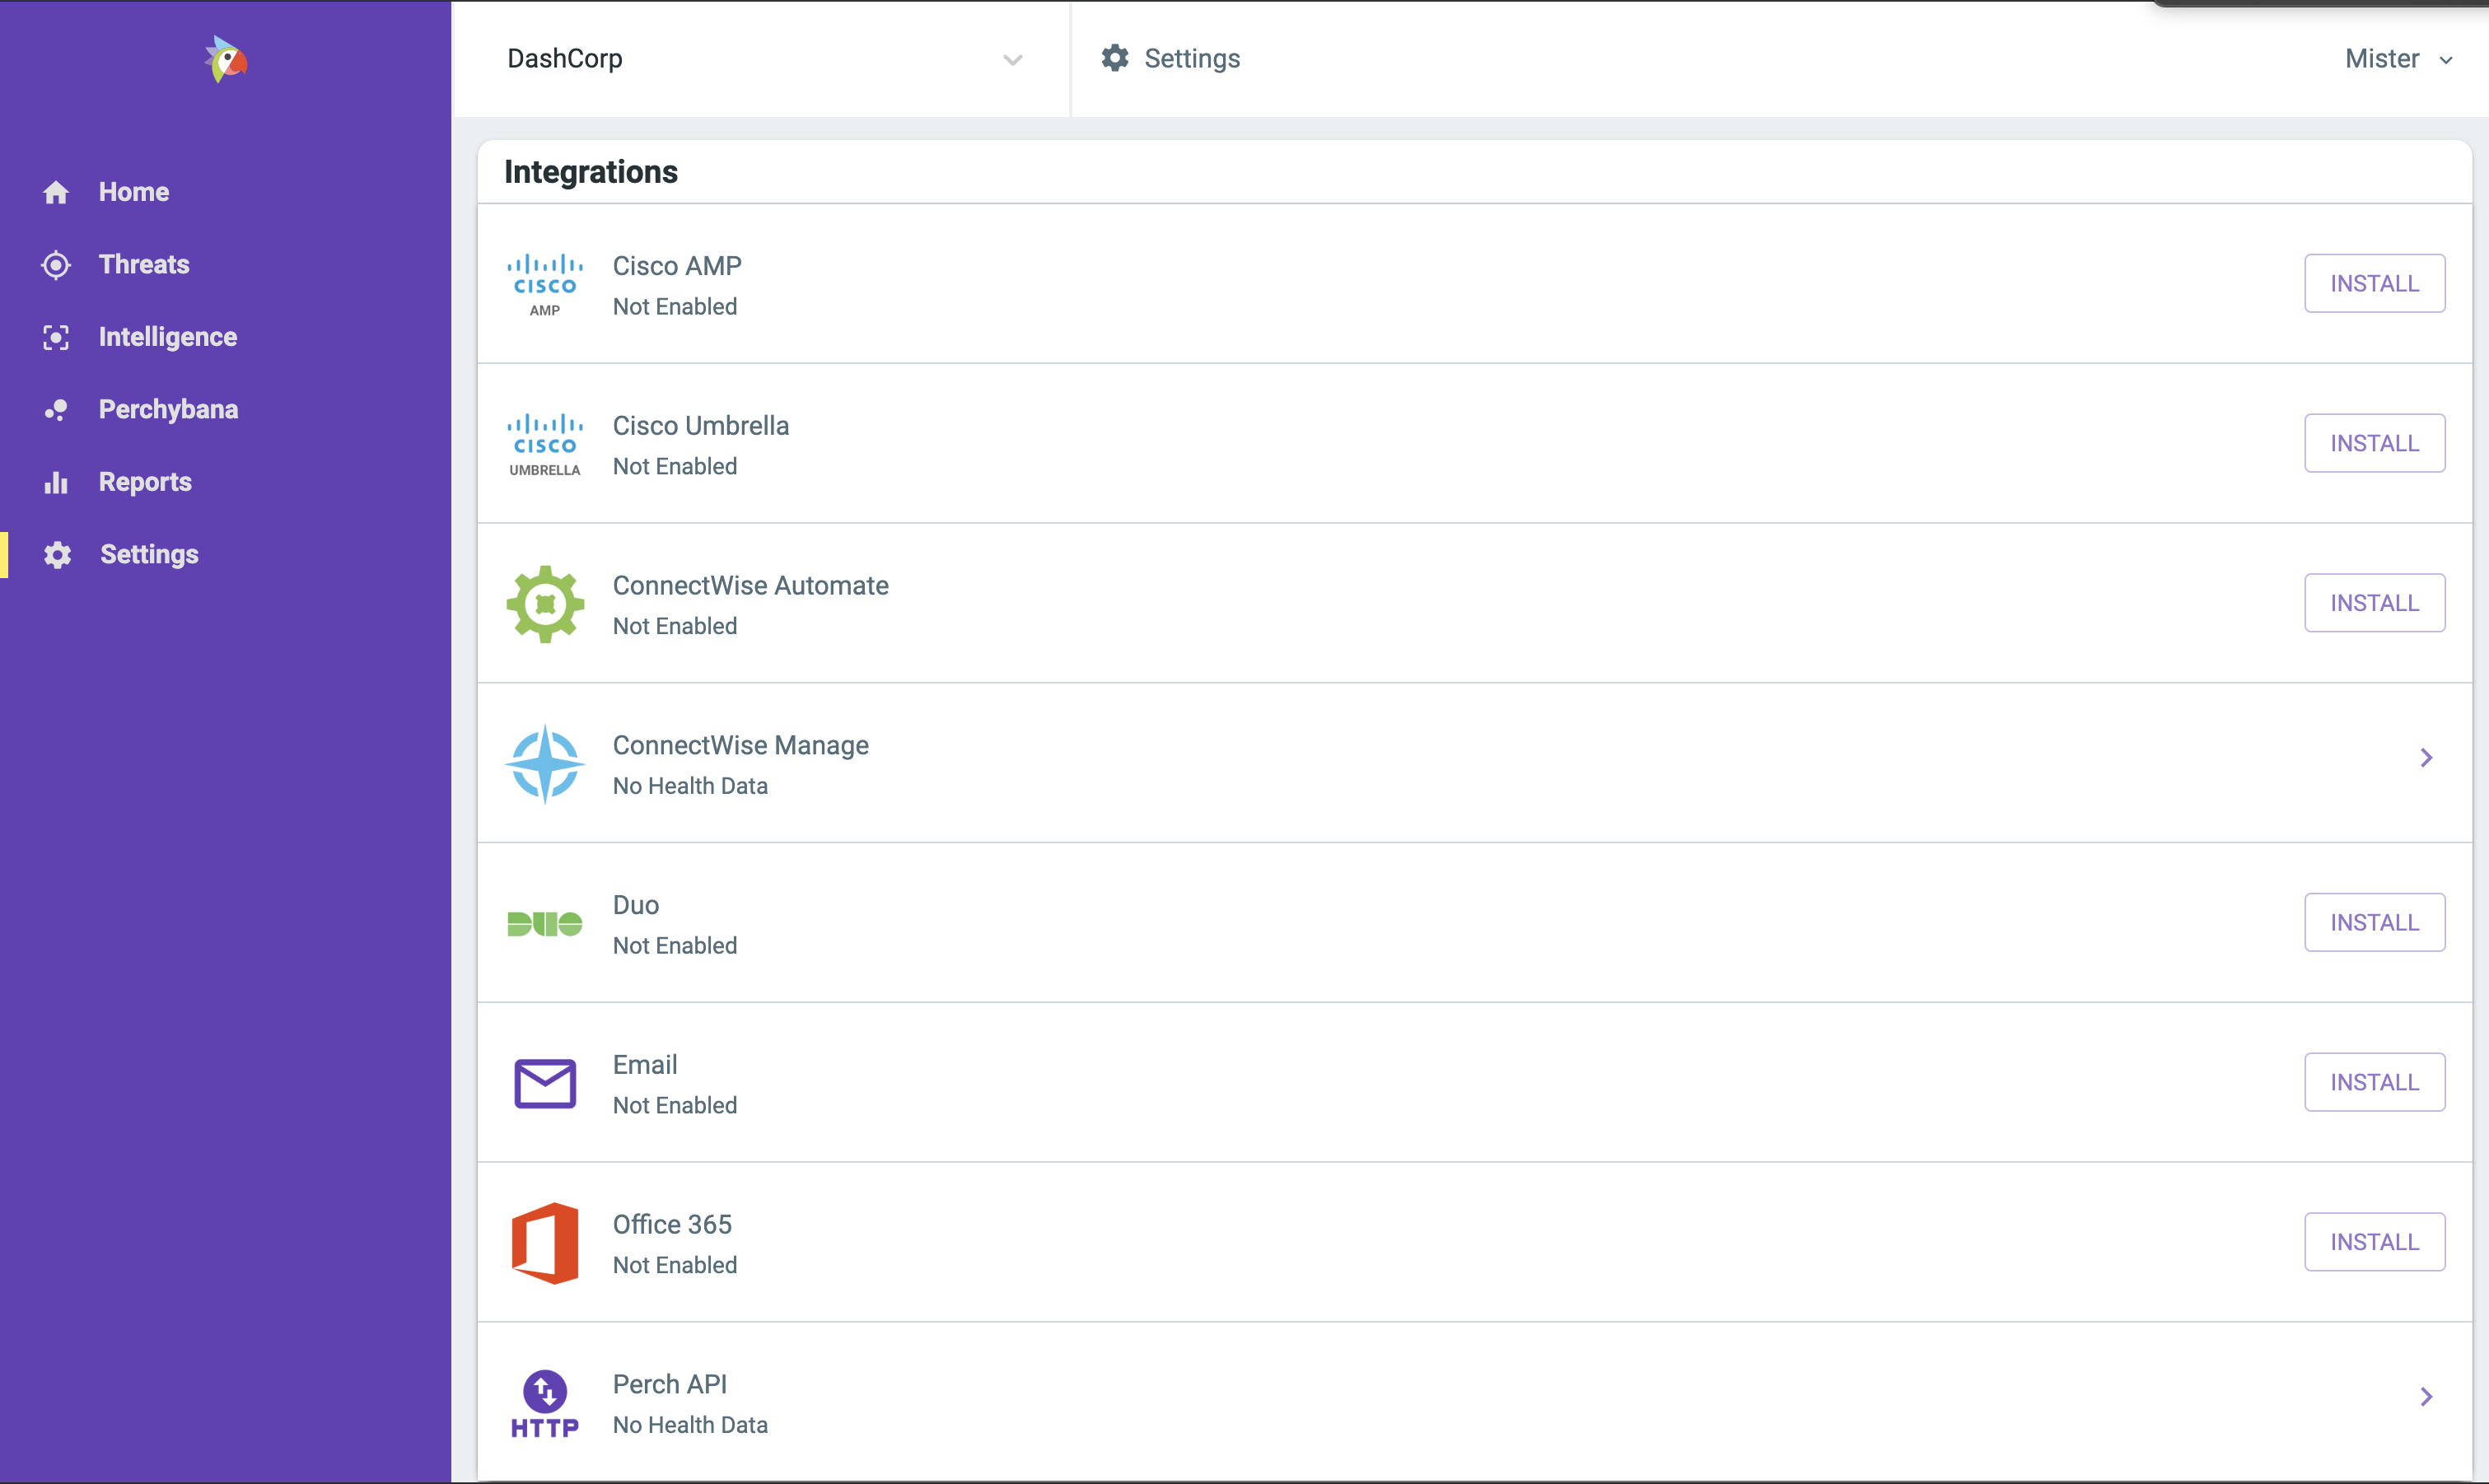
Click “Install” next to the right of the Cisco Umbrella icon in Integrations section. Installation just takes a second to enable your account. You will see a successful message pop up at the bottom of the screen. After a successful install you will be taken to the Perch page to configure integration.
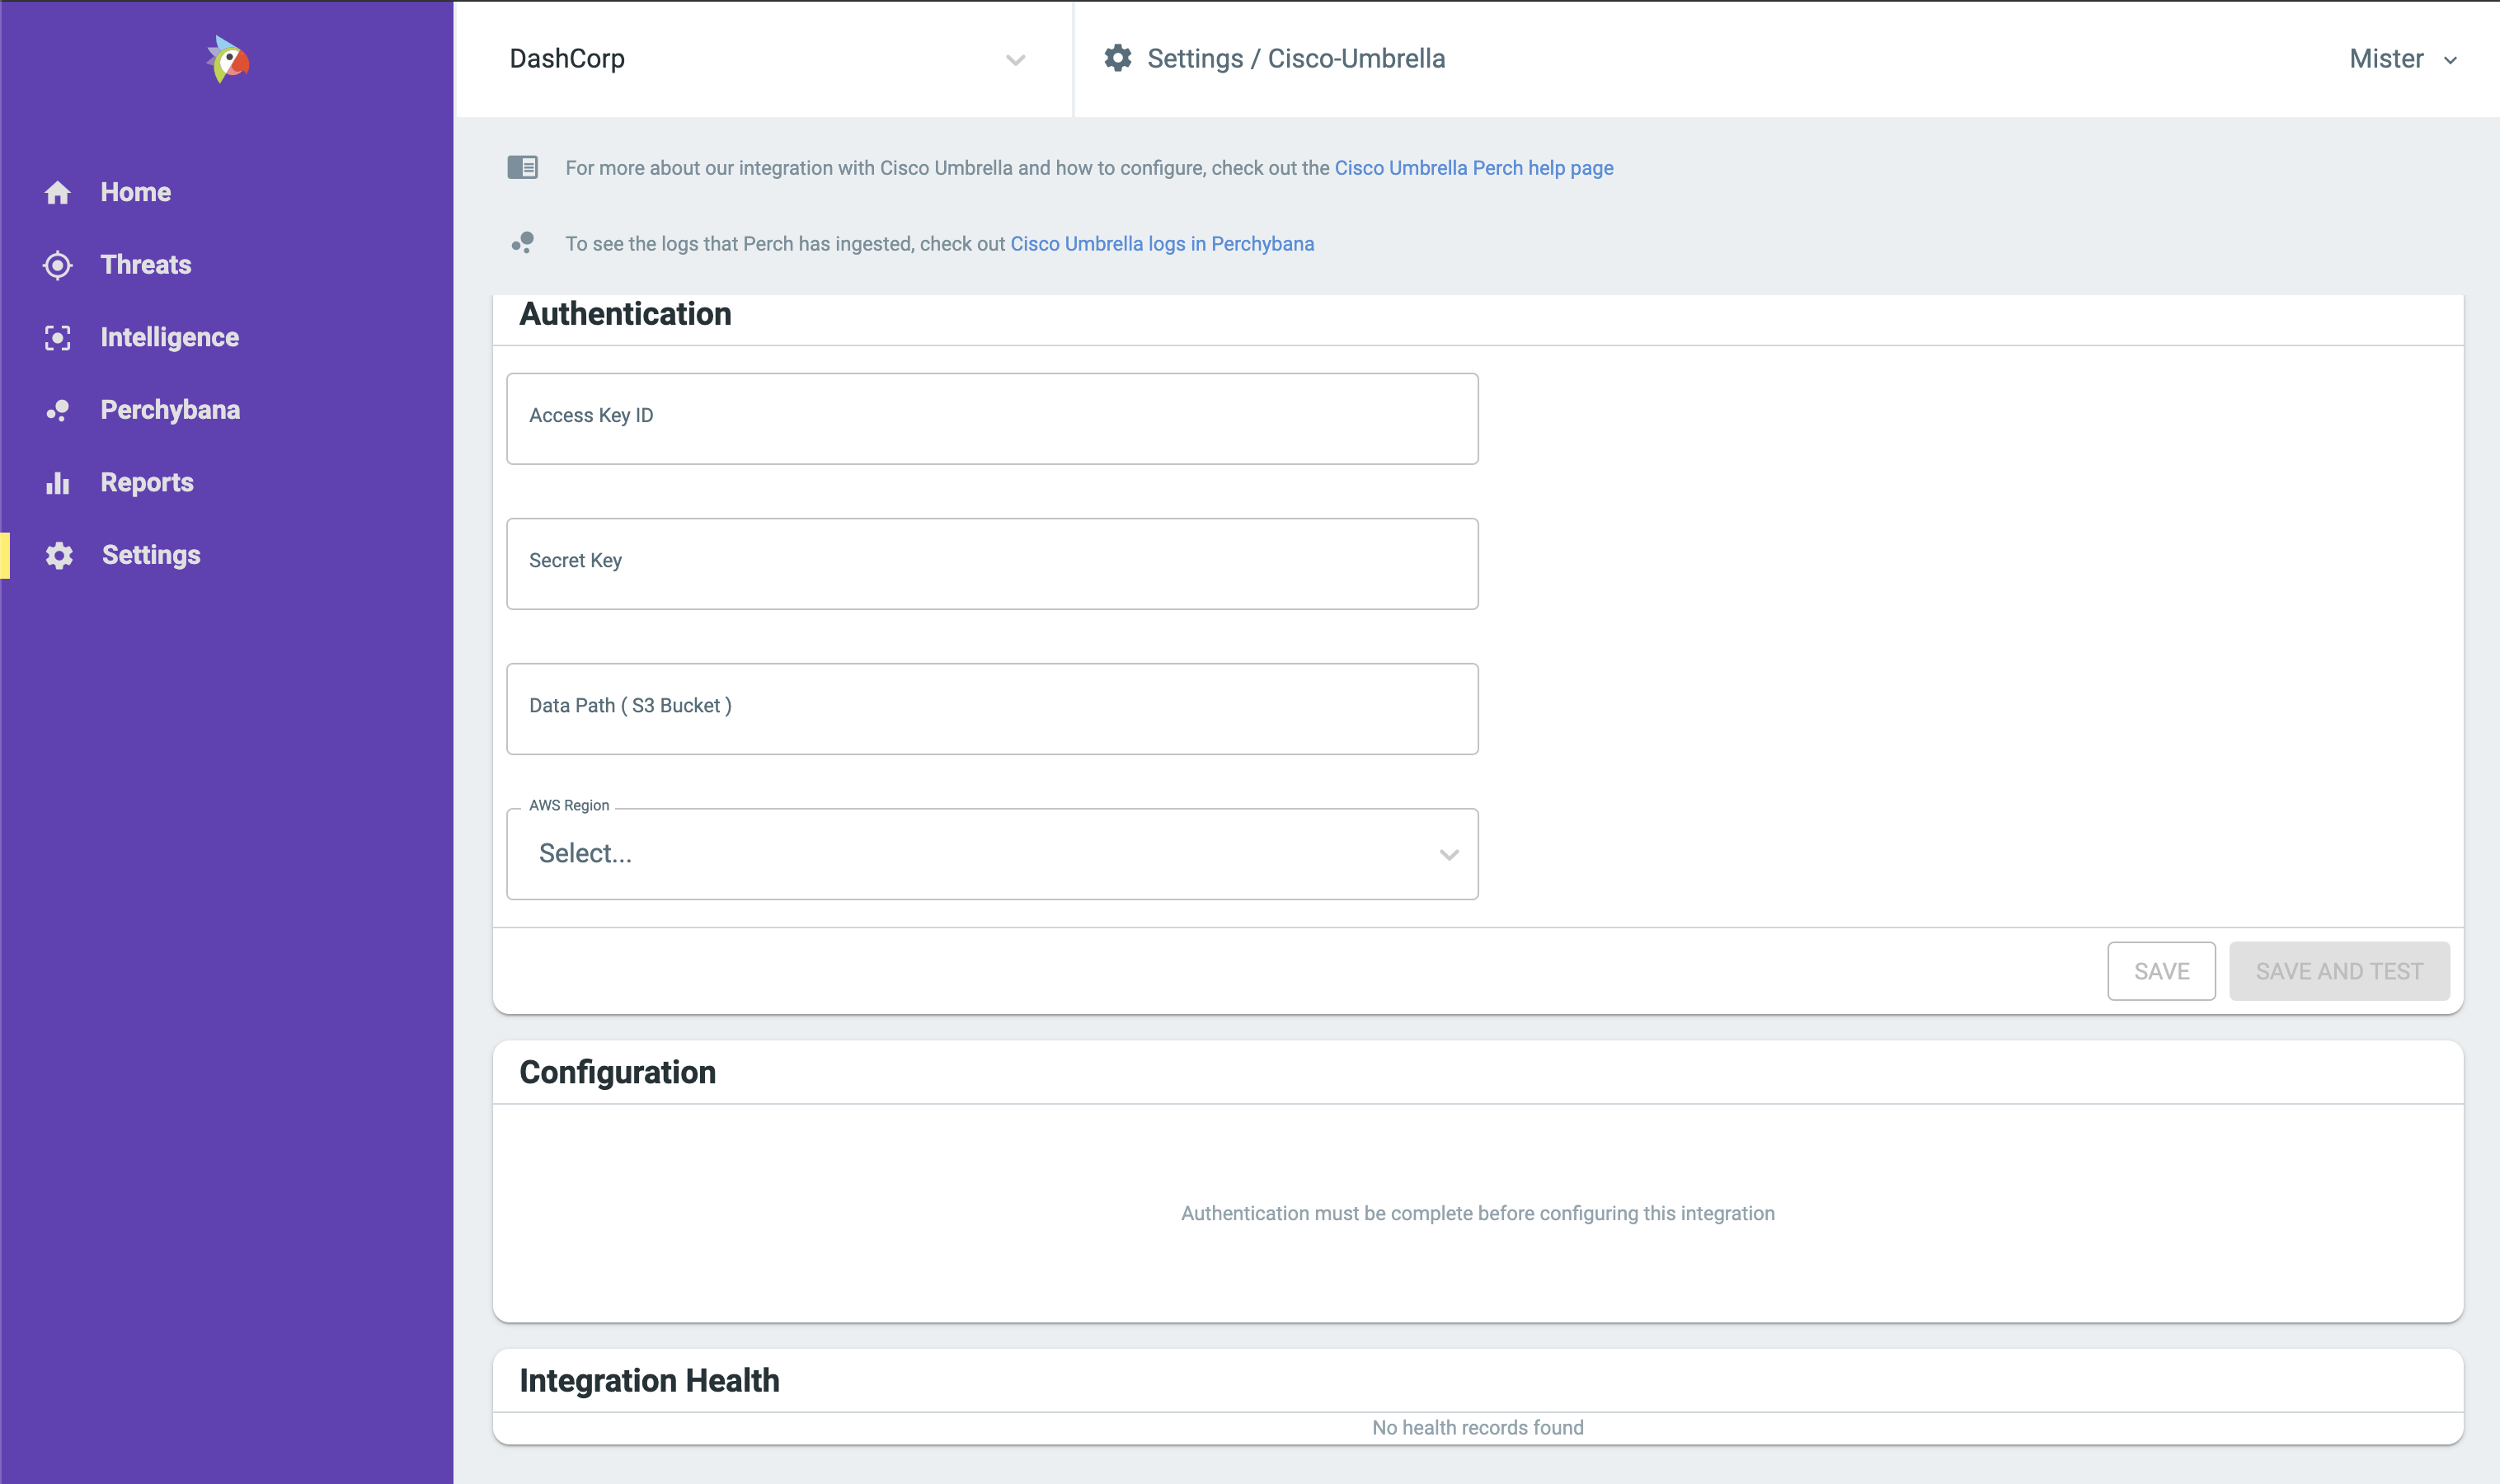
Now just fill out the integration settings with the required information.
Insert your Access Key, Secret Key, and Data Path in the Authentication Section. Additionally, you will need to select the AWS Region.
You can then Save or Save and Test your configuration. Once the configuration is saved, you can toggle on Cisco Umbrella log collection in the Configuration section.
Perch will report integration health every time it pulls logs. If there is an error, you will see it in the integration health section. You can get more details from the API call about why an error may be occurring. If there is an error, it is likely related to credentials or network issues between Perch cloud and the Cisco-managed AWS bucket.
Still having trouble? Reach out to one or our specialists at help@perchsecurity.com