Integrations
Cisco Meraki
Cisco Meraki
Perch’s integration with Cisco Meraki allows you to store, search, and visualize data generated by your Meraki devices within Perch.
- Enable Dashboard API access and generate a Meraki API Dashboard Key
- Navigate to Settings > Cisco Meraki to install and configure the integration
- Test the connection
- Enjoy
Generate Cisco Meraki API Dashboard Key
In order for Perch to access your Meraki logs, generate an API token from the Meraki Web dashboard and provide it to Perch.
- Log into the Meraki Console as an Admin
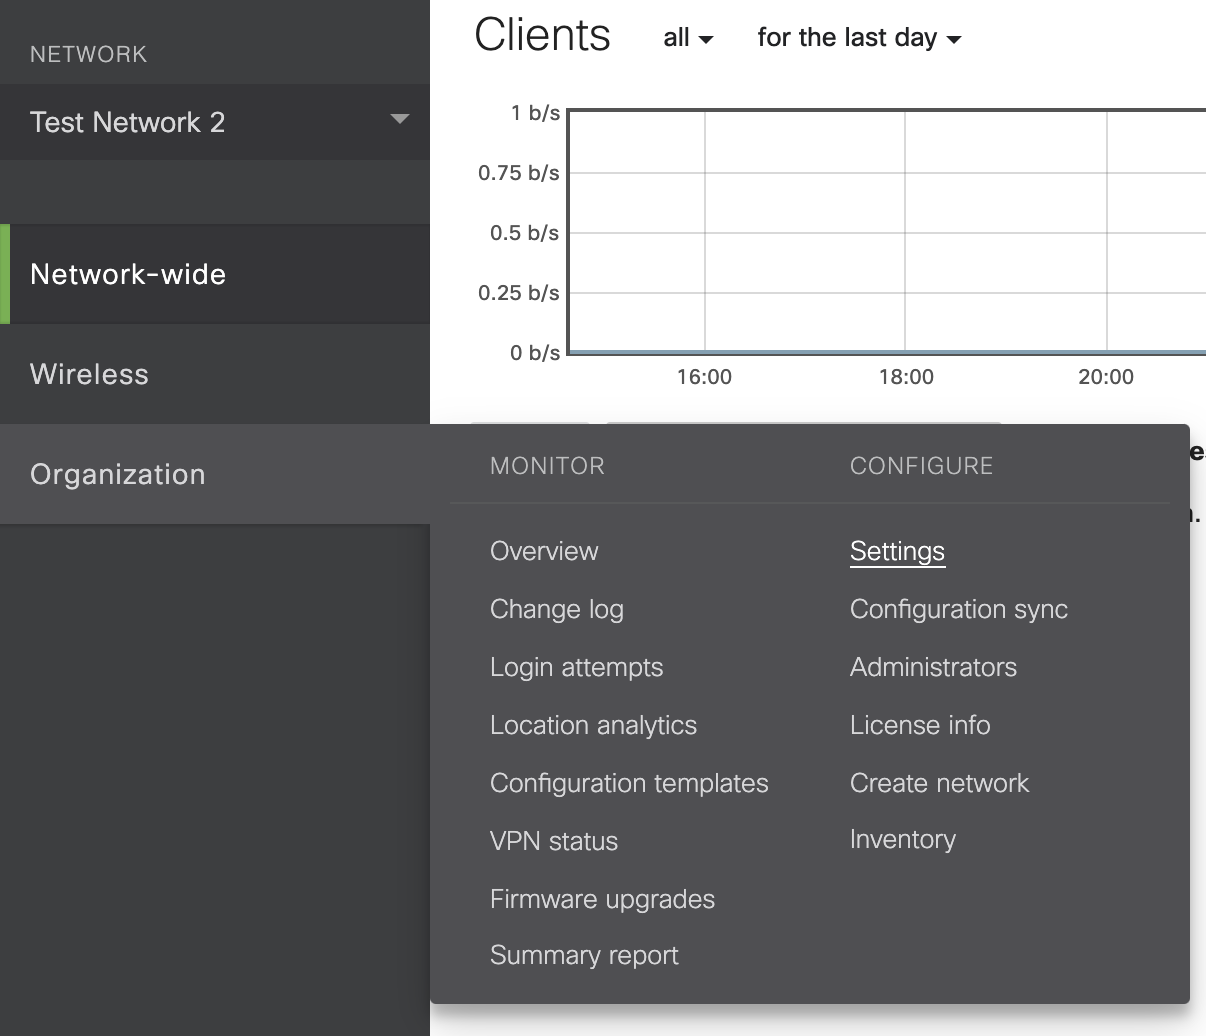
- Navigate to Organization > Settings
- Near the bottom of the page, locate and check the box for Enable access to the Cisco Meraki Dashboard API

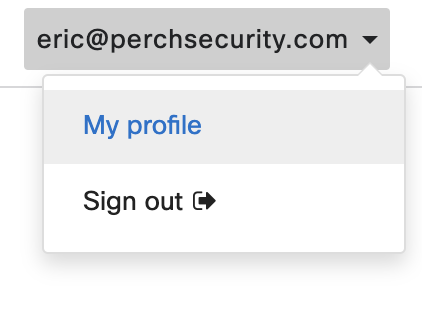
- Generate the API key. Click on your username within the top navigation bar and click My Profile
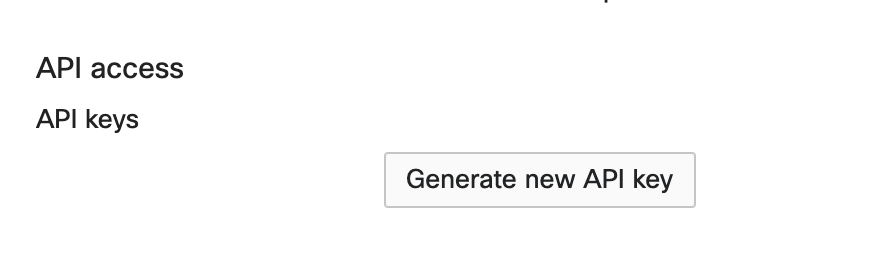
- Click on Generate a New API Token and copy it to your clipboard. (You’ll need it for the next step.) Don’t exit from the Meraki Portal – we will return for one final step.
Set up the integration in Perch
- Log into the Perch app
- Navigate to the Settings page
- Scroll to Cisco Meraki integration
- Click Install
- In the Perch Meraki authentication panel, paste your API Token

- Next, generate a new shared secret and copy it to your clipboard. We recommend letting a password manager do this for you to ensure it is a unique and complex password.
- Paste the newly-generated secret in the Cisco Meraki Shared Secret section of the Perch app.
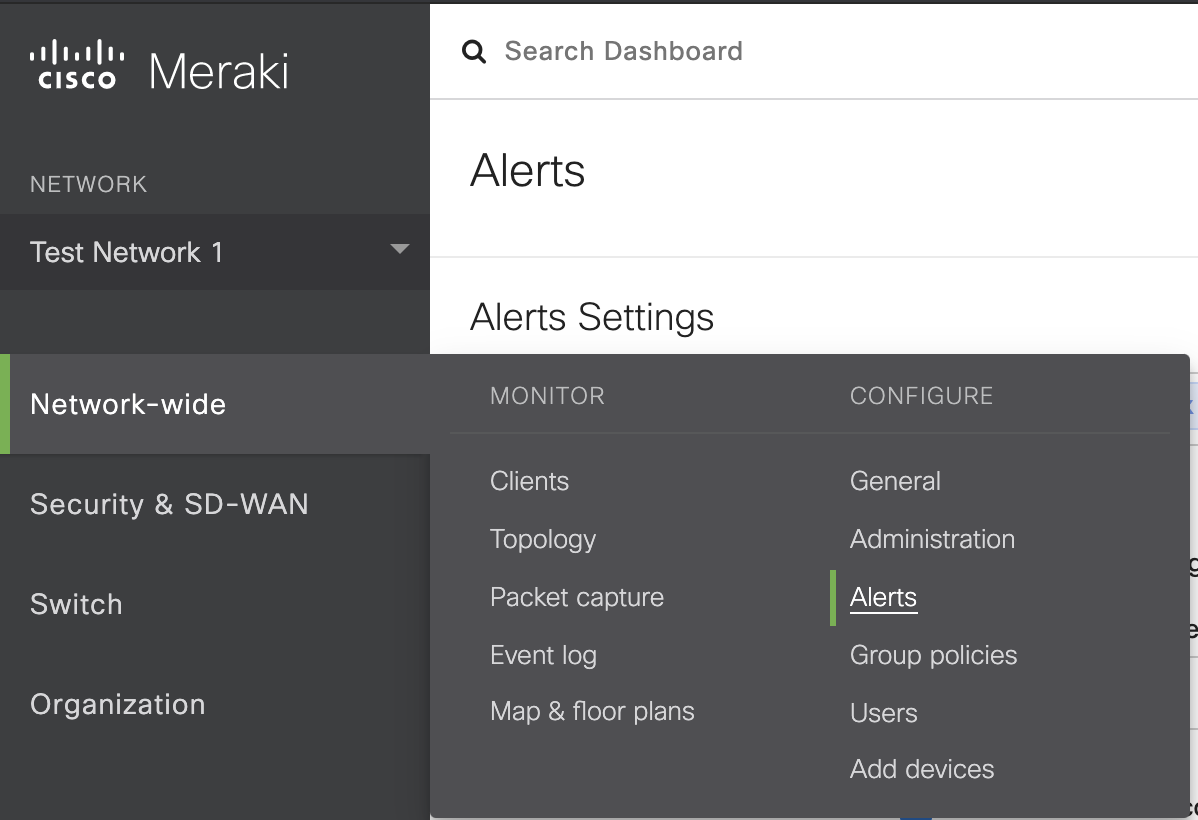
- Return to the Meraki Portal and navigate to Network-Wide > Alerts
- Scroll to the bottom of the page to the Webhooks section and Create an HTTP Server
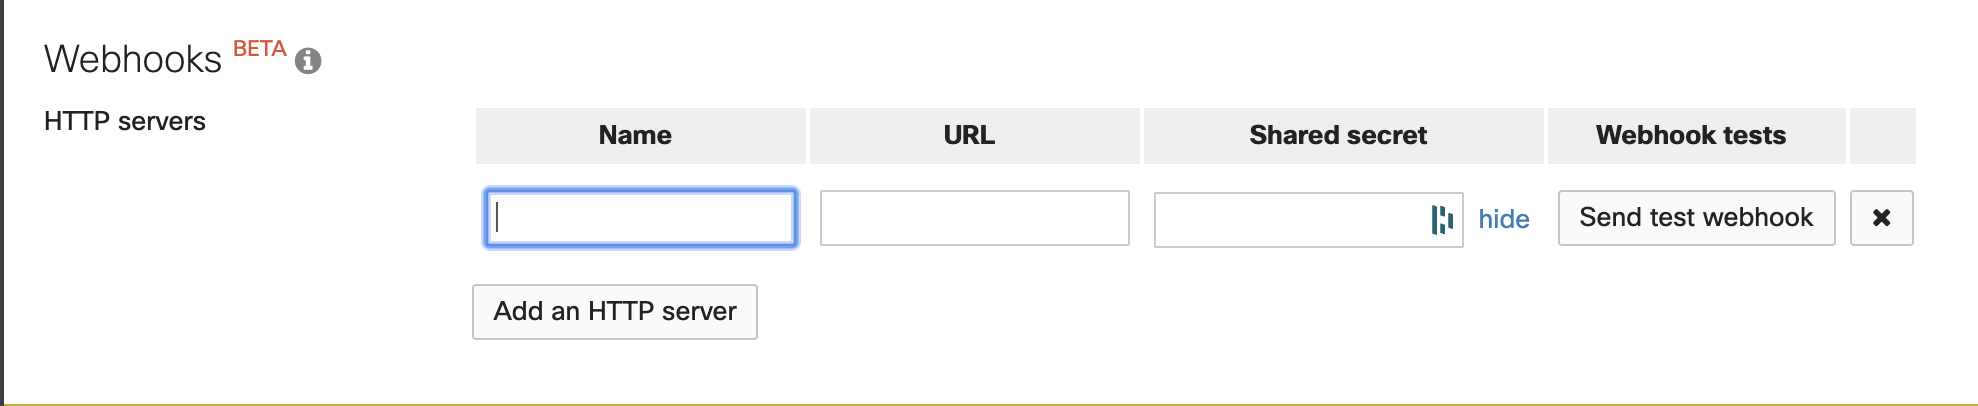
- Provide a relevant name, paste in the shared secret, and return to the Perch app
- Finally, copy the URL from the Perch settings page and paste it into the URL prompt on the Meraki Portal

- Save all changes and test the integration
Enable log ingestion
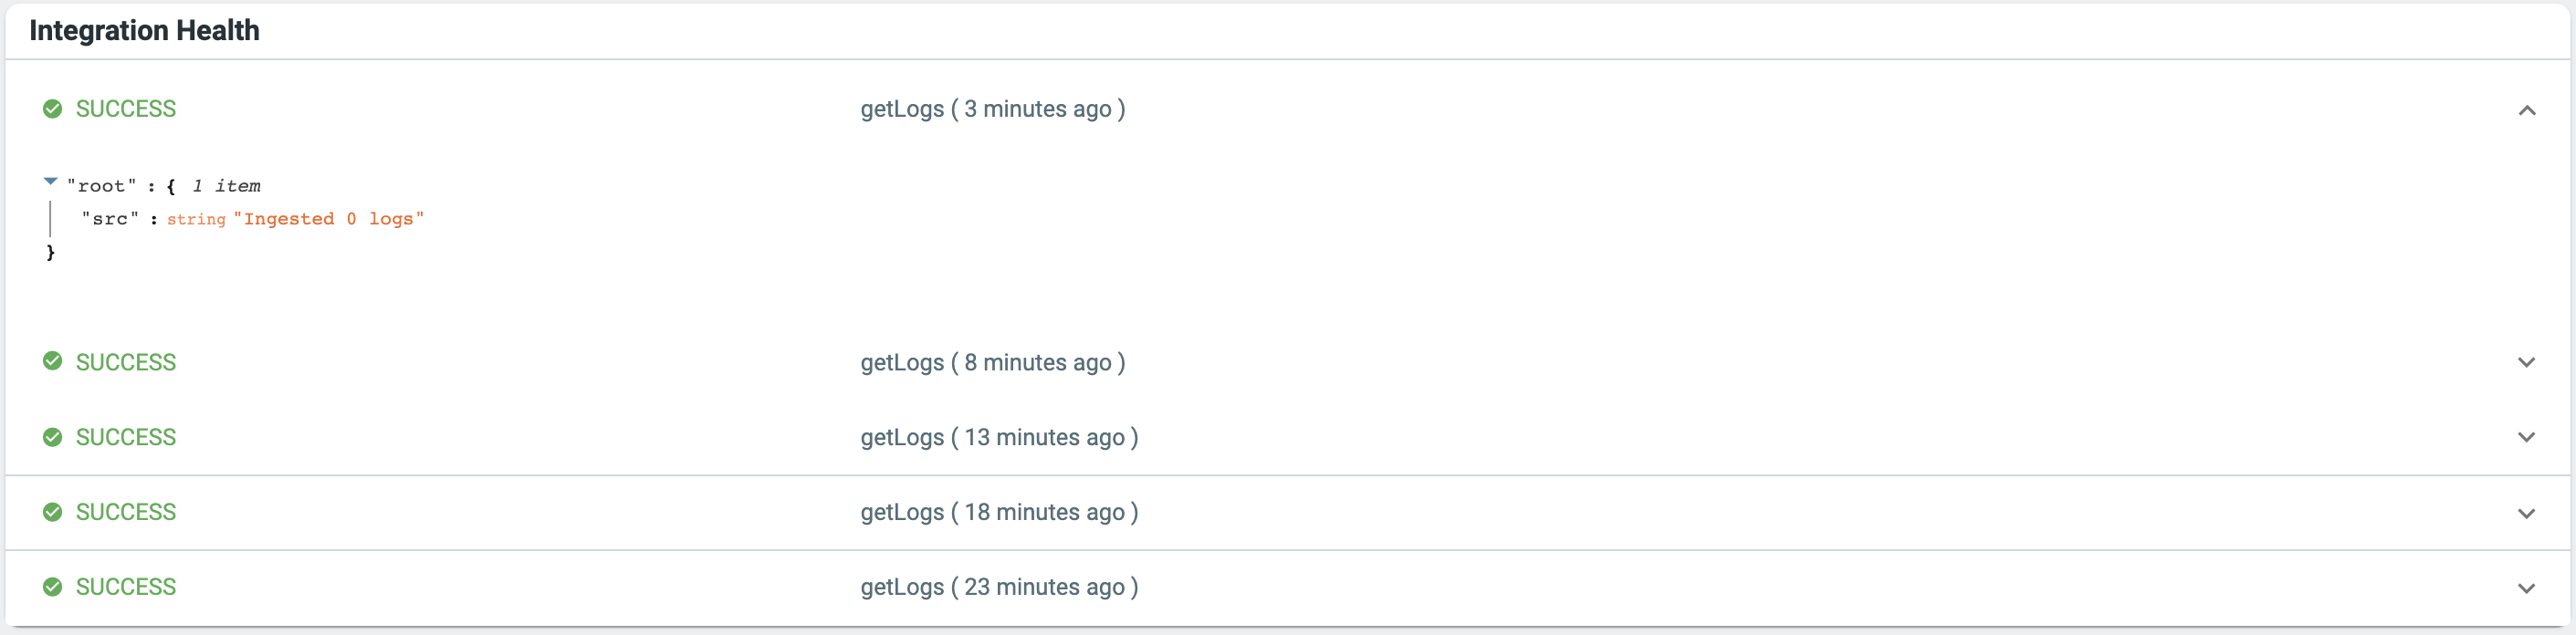
Like all Perch integrations, you can enable or disable log ingestion at any time by toggling the switch from OFF ( gray ) to ON ( purple ), or vice-versa.
Once you enable the log ingestion, you’ll receive a success message which you can toggle to see the health status of your integration.
Still having trouble? Reach out to one or our specialists at help@perchsecurity.com