Organizations
Enable Azure AD SSO for the organization
Enable Azure AD SSO for the organization
Configure the app registration in the Azure portal
- Log in to the Azure Portal portal.
- Navigate to Azure Active Directory - App Registrations.
- Select Register an application. Then enter in and select the following information:
- Name: Perch SSO (this can be any name)
- Supported account types: Accounts in this organizational directory only (Default Directory only - Single-tenant)
- Redirect URL: https://access.perchsecurity.com/login/callback

- Navigate to the newly created App Registration and click Overview.
- Make note of the Application (client) ID.

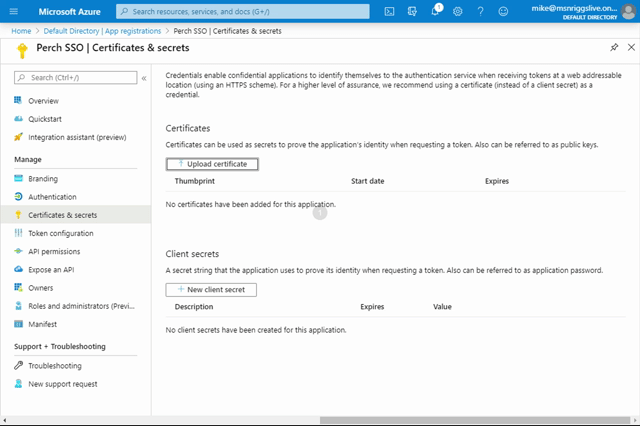
- Navigate to Certificate & Secrets.
- Under Client secrets, click +New client secret.
- Name the client secret appropriately and choose your expiration.
- Make note of the newly created client secret.
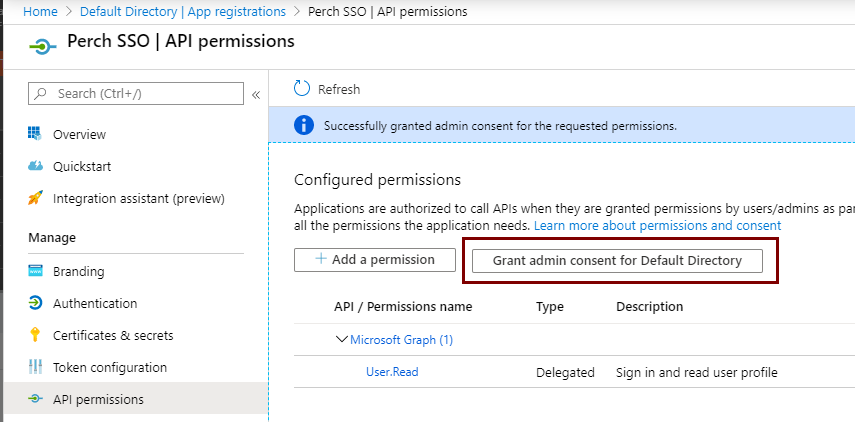
- Navigate to API Permissions and click Grant Admin consent for Default Directory.
Configure Perch to enable Azure AD SSO
- From the main menu, click on Settings.
- Select Security.
- Under Enterprise SSO Connection, toggle the Enabled slider to On.
- In the Provider dropdown, select Microsoft Azure AD.
- Using the information collected from the newly created App Registration, fill in the fields as shown in the picture below.
- Use your primary domain name in Microsoft Azure AD Domain and add additional domain aliases if needed.

- Click Save.